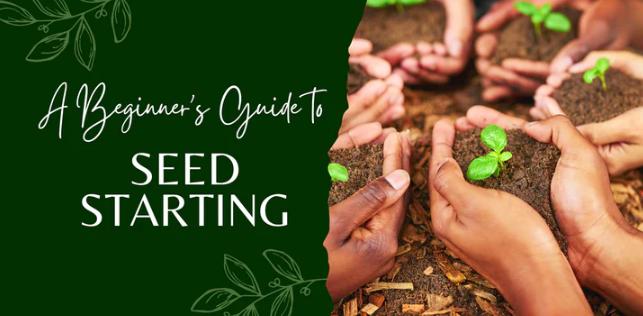
Starting seeds at home is a rewarding and cost-effective way to begin a garden. By starting seeds indoors, gardeners have more control over the growing conditions and can ensure that their plants get off to a strong start. Seed starting is also a great way to try out new or unusual varieties of plants that may not be available as seedlings at local nurseries.
Welcome to Grace Walk Farm, our family homestead in western NC. We share the highs and lows of our homestead journey, in hopes that it will encourage you to grow your own food too. Click here to grab our Beginner Garden Guide for free! Join our 600K strong Instagram community of homesteaders here. Thanks for stopping by!
Seed starting involves sowing seeds in containers, such as seed trays or pots, and providing the necessary care and conditions for the seeds to germinate and grow into seedlings. Once the seedlings are large enough and the weather is suitable, they can be transplanted into the garden or into larger pots.
Seed starting is especially important for gardeners in colder climates, as it allows them to get a jump start on the growing season. It is also useful for those with limited outdoor space, as it allows them to grow a wider variety of plants in a smaller area.
There are many benefits to starting seeds at home. It is a more economical option than buying seedlings or mature plants, as a single seed can produce multiple plants. It is also a sustainable practice, as it reduces the need for transportation and packaging of plants that are grown and sold commercially.

Finally, starting seeds at home allows gardeners to be more self-sufficient and to have a greater connection to the plants they are growing.
In this post, we will delve into the planning and preparation needed for successful seed starting, as well as provide step-by-step instructions for sowing and caring for seeds. We will also discuss advanced techniques for seed starting and the importance of proper transplanting to ensure the success of your seedlings.

Planning and Preparation for Seed Starting
When it comes to starting seeds, the key to success is proper planning and preparation. This includes choosing the right seeds for your location and climate, determining when to start those seeds, and gathering the necessary supplies.
Choosing the Right Seeds for Your Location and Climate
One of the most important factors to consider when choosing seeds is the climate and growing conditions in your area. Make sure to select seeds that are suitable for your location’s hardiness zone, as well as any specific microclimates or growing conditions in your garden. If you aren’t sure which gardening zone you live in, you can find that information here.
You should also consider the timing of your planting. Choose seeds that have a recommended planting date that falls within your region’s frost-free window. This will ensure that your seedlings have enough time to grow and mature before the arrival of cold temperatures.

Determining When to Start Seeds
The timing of when to start seeds will depend on the type of plants you are growing, as well as the climate and growing conditions in your area. In general, it is best to start seeds indoors before the last frost date in your region. This will give your seedlings enough time to grow and mature before transplanting them into the garden.
To determine the best time to start seeds in your area, you can find your customers planting dates based on your zip code at Almanac.com. These schedules will provide specific recommendations for starting different types of seeds at the appropriate time for your region.

Necessary Supplies for Seed Starting
Starting seeds requires a few basic supplies, including seed starting mix or potting soil, pots or trays, and a seed starting heat mat (if needed).
Seed starting mix is a specially formulated soil-less mixture that is ideal for starting seeds. It is lightweight and well-draining, and provides the proper nutrients and moisture for seedlings to thrive. However, seed starting mix won’t have enough nutrition to carry your plants through until time to transplant into the garden so if you choose to use a seed starting mix, you will need to transplant the seedlings into a potting mix once they have their first set of true leaves.
Another option is to skip the seed starting mix and just plant your seeds in a potting mix blend. Look for a potting mix that doesn’t contain added fertilizers as this can damage baby plants and burn them.
Pots or trays are needed to hold the seed starting mix and seeds. You can use a variety of containers, such as pots, trays, or even recycled containers like egg cartons or milk jugs. Just make sure to punch holes in the bottom for drainage.
I prefer to start my seeds in 4-inch pots. These can be washed at the end of seed starting season and reused year after year.
If you are starting seeds in a location that is cool or has low light levels, you may want to use a seed starting heat mat. This can help to keep the soil at a consistent, warm temperature, which is essential for proper seed germination.
Last, you will need sunlight. Once the plants germinate, they will need to be able to access light to have the energy to grow. You have a few options here. You can try a sunny window, which is usually enough to get plants going. But sometimes, this can lead to leggy seedlings as they reach for the light that is just too far away. More on how to correct leggy seedlings a little later.
Personally, I prefer to start my seeds under LED grow lights. These inexpensive light strips can be zip tied to a shelf. Place seedlings below the lights, positioning your lights about 2-3 inches above the top of your plants. I leave my grow lights on for around 18 hours a day. Once seedlings have 3-4 true leaves and are well established, they can be moved to a greenhouse (as long as temperatures don’t fall below freezing).
I’ll be starting my first seeds under grow lights this week (end of January) and most of them will transition to the garden or the greenhouse in March or April. By starting seeds early, I give them time to get a head start and become large, established plants before transplanting. If you’re unsure when to start seeds, you can refer to the seed packet. It should give you the number of days it takes to reach a harvest and the temperatures that particular plant can tolerate.

Preparing for Seed Starting
Before you start your seeds, you will need to prepare your pots or trays by filling them with seed starting mix and moistening it. I know – it sounds strange. But you should water your soil before you plant your seeds. Then, follow the specific seed planting instructions on the back of the seed packet, including the depth at which to plant the seeds and any special care or conditions that they may require.
Once your seeds are planted, cover the pots or trays with a plastic cover or clear plastic bag to create a greenhouse effect and help retain moisture. This will help to create the warm, humid environment that seeds need to germinate.
Remember to label your pots or trays with the type of seeds and the date they were planted. This will help you keep track of your seedlings as they grow and mature.
With proper planning and preparation, seed starting can be a rewarding and fulfilling experience that allows you to grow a wide variety of plants in your own garden.

Caring for Seedlings
Once your seeds have germinated and the seedlings have emerged, it’s important to provide proper care to ensure they grow into healthy plants. Follow these tips for watering and fertilizing seedlings:
Water the seedlings regularly, but be careful not to overwater. Stick your finger about an inch into the seed-starting mix to check the moisture level. If it feels dry, it’s time to water. If it feels damp, wait and check again tomorrow.
Use a watering can with a fine nozzle or a spray bottle to avoid disturbing the seedlings. Water the seedlings from the bottom by filling a tray or saucer with water and placing the container in it for about 15 minutes. This allows the water to be absorbed from the bottom, which reduces the risk of the seedlings becoming waterlogged or developing damping off disease.
I prefer to place all my 4 inch cups in 1040 trays. I water the plants by adding a half inch of water to the 1040 tray and then let the water seed through the holes in the 4 inch pots to moisten the soil and water the roots. This technique is called “bottom watering” and it’s helpful for preventing mildew and mold issues from setting up in your soil.
If you do notice some mold on top of your soil, you can gently try to scoop out the effected soil without disturbing your seedling. You can also sprinkle cinnamon on top of the soil, as this can be a preventative measure to keep mold and mildew from setting in to start with.
Fertilize the seedlings once they have their first set of true leaves, which are the leaves that emerge after the initial seed leaves. Use a water-soluble fertilizer at half strength, and fertilize every two weeks until the seedlings are ready to be transplanted.
As the seedlings grow, you may need to thin them out by removing some of the weaker or smaller seedlings to give the remaining ones more space to grow. This is especially important if you have planted multiple seeds in the same container.

Troubleshooting common problems for seed starting
Starting seeds indoors can be a rewarding and fulfilling process, but it can also be frustrating if you encounter problems along the way. Here are some common issues that arise when starting seeds indoors, and how to troubleshoot them:
Poor germination: If you are having trouble getting your seeds to germinate, there are a few potential causes. One common issue is that the seeds are too old and have lost viability. Another possibility is that the seeds were not stored properly and have become damaged. Make sure to use fresh, high-quality seeds and store them in a cool, dry place to help prevent these issues.
Another issue could be that the seeds are not receiving enough moisture or warmth. Make sure to keep your seeds moist (but not waterlogged) and provide a warm environment for them to germinate.
Damping-off: Damping-off is a fungal disease that can cause seedlings to wilt and die. It is caused by poorly drained soil, high humidity, and cool temperatures. To prevent damping-off, use a well-draining soil mix and provide good air circulation around your seedlings. Avoid overwatering and keep the temperature around the seedlings warm (but not too hot).
Leggy seedlings: Seedlings that are too tall and spindly (known as “leggy” seedlings) are often a result of insufficient light. Make sure to provide your seedlings with plenty of light, either from natural sources or with a grow light. If your seedlings are still leggy despite adequate lighting, they may be reaching for the light and not getting enough support. In this case, try using stakes or other supports to help hold them up.
Pest infestations: Pests such as aphids, whiteflies, and spider mites can be a problem when starting seeds indoors. To prevent these pests, make sure to keep your seedlings clean and free of debris, and use a natural pest repellent such as neem oil if necessary.
Poor transplanting: When it comes time to transplant your seedlings, it is important to handle them carefully to avoid damaging the roots. Make sure to gently loosen the roots before transplanting and water the seedlings well after transplanting to help them adjust to their new environment.

Let’s Talk About Transplanting Seedlings
Transplanting seedlings can be a rewarding and exciting experience for any gardener, as it allows for the opportunity to grow a wider variety of plants and to potentially get a head start on the growing season. However, it is important to carefully consider the timing and location of the transplant, as well as properly prepare the transplant site and provide proper care for the seedlings to ensure their successful establishment.
When choosing the right time and location to transplant seedlings, consider the specific needs of the plants being transplanted. Some plants, such as tomatoes and peppers, prefer warmer weather and should be transplanted after the risk of frost has passed. Other plants, such as lettuce and spinach, can tolerate cooler temperatures and can be transplanted earlier in the season. This information is usually found on the back of your seed packet.
It is also important to choose a location that receives the appropriate amount of sunlight for the specific type of plant being transplanted. For example, tomatoes and peppers typically require at least 6-8 hours of direct sunlight per day, while lettuce and spinach can tolerate partial shade.
Before transplanting seedlings, properly prepare the transplant site. This includes removing any weeds or debris, and loosening the soil to allow for proper root growth. It is also a good idea to enrich the soil with compost or other organic matter to provide the seedlings with the nutrients they need to thrive.
Once the transplant site is prepared, the seedlings can be transplanted. It is important to handle the seedlings carefully, as their roots are delicate and can be easily damaged. Gently loosen the roots and place the seedling in the prepared hole, making sure to cover the roots completely with soil. After transplanting, the seedlings should be watered thoroughly to help them establish themselves in their new location.

Hardening Off Seedlings
Hardening off seedlings is a crucial step in the process of transplanting them into the garden. It allows the seedlings to acclimate to the outdoor environment and become more resilient to temperature changes, wind, and other environmental stresses.
To harden off seedlings, start by placing them in a sheltered location outside, such as a cold frame or a porch. Gradually increase the amount of time the seedlings spend outside each day, starting with a few hours and working up to a full day over the course of a week or two. Be sure to bring the seedlings inside at night, especially if temperatures are expected to drop below freezing.
As the seedlings become more accustomed to being outside, you can also start exposing them to more direct sunlight, wind, and other elements of the outdoor environment. This will help them develop stronger stems and leaves, which will make them better equipped to handle the challenges of life in the garden.
When transplanting seedlings into the garden, be sure to choose a location that receives plenty of sunlight and has well-draining soil. Water the seedlings well before transplanting, and be gentle when handling them to avoid damaging their fragile roots. It’s also a good idea to mulch around the base of the seedlings to help retain moisture and suppress weeds.
Hardening off seedlings may seem like a time-consuming process, but it’s well worth the effort. By taking the time to properly acclimate your seedlings to the outdoor environment, you can increase the chances of success and help ensure that your plants thrive in the garden.
Taking Care of Your Transplanted Seedlings
Caring for transplanted seedlings is crucial for their successful establishment. This includes providing the seedlings with the appropriate amount of water, as well as protecting them from extreme weather conditions such as strong winds or extreme heat. It may also be necessary to provide the seedlings with additional support, such as stakes or cages, to help them stand upright and prevent them from being damaged.

Advanced Seed Starting Techniques
While the basic process of starting seeds is relatively straightforward – simply sow the seeds in soil and provide the necessary moisture and light – there are a few advanced techniques that can help improve the success rate of your seedlings and give them a strong start.
One advanced technique for starting seeds is to use a greenhouse or grow lights. A greenhouse provides a controlled environment that can mimic the natural growing conditions of your chosen plants, and can be especially useful for starting seeds in the colder months. Grow lights, on the other hand, can be used to supplement natural light and provide the specific spectrum of light that your plants need to thrive. Both options can be expensive upfront, but they can save you money in the long run by allowing you to start seeds earlier in the season and extend your growing season.
Another advanced technique is to use alternative planting methods, such as soil blocks or seed tapes. Soil blocks are small, self-contained blocks of soil that you can use to start seeds individually, rather than in a traditional seed tray or pot. This can reduce the risk of transplant shock and allow you to plant your seedlings directly in the ground, as the soil block will simply dissolve once it is watered.
Seed tapes, on the other hand, are strips of paper or fabric that have seeds embedded in them at specific intervals. When you plant a seed tape, the seeds are already spaced out perfectly and at the correct depth, which can make the planting process more efficient and reduce the risk of over- or under-watering.
Finally, you can also start seeds outdoors in a cold frame or in a protective cover, such as a row cover or cloche. A cold frame is a bottomless box that is covered with a transparent or translucent material, such as glass or plastic, and is used to provide extra warmth and protection to young seedlings. A row cover or cloche, on the other hand, is a lightweight fabric or plastic that is placed over the seedlings to protect them from pests and extreme weather conditions. These options can be especially useful for hardening off your seedlings and getting them ready for transplanting into the garden.

In conclusion, there are a variety of advanced techniques that you can use to start seeds and give your seedlings the best possible start. Whether you use a greenhouse, grow lights, alternative planting methods, or a cold frame or protective cover, these techniques can help you achieve better results and grow a wider variety of plants at home.
Do you have more questions about seed starting? Drop your questions in the comments and we will address them in our next Q+A video!
Also check out these blogs:


