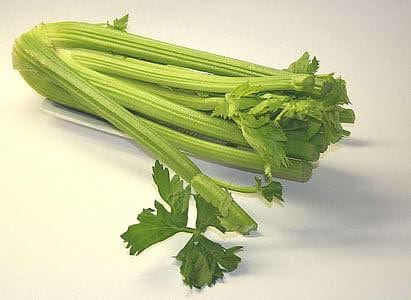
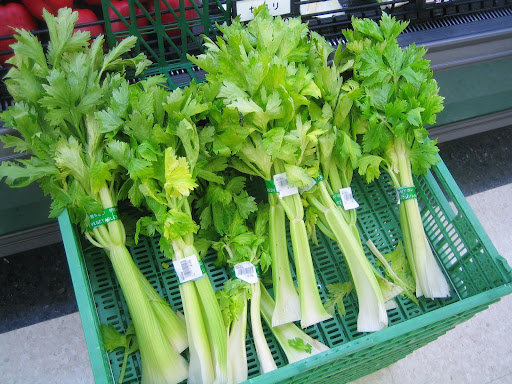
Celery has a reputation for being a little fussy, but once you understand what it needs, it’s a fantastic addition to your garden. Unlike store-bought celery, which can be bland and watery, homegrown celery is packed with flavor, crunch, and nutrients. The key to success? Plenty of water, nutrient-rich soil, and patience.
If you’ve struggled with thin, stringy stalks or slow-growing plants, don’t worry—you’re not alone! Celery takes a little more care than some other veggies, but with the right approach, you’ll be harvesting crisp, flavorful stalks in no time. This guide will walk you through how to grow celery, from seed to harvest, with practical tips, troubleshooting hacks, and companion planting insights.
Welcome to Grace Walk Farm, our family homestead in western NC. We share the highs and lows of our homestead journey, in hopes that it will encourage you to grow your own food too. Click here to grab our Beginner Garden Guide for free! Join our 600K strong Instagram community of homesteaders here. Thanks for stopping by!
Choosing the Right Variety
Celery comes in a few different types, each with its own growing habits. Choosing the right variety for your climate and needs will make growing it much easier.
Pascal Celery – The classic type found in grocery stores. It grows tall, thick, and crisp, with a long growing season. ‘Tall Utah’ and ‘Golden Self-Blanching’ are great options.
Chinese Celery (Leaf Celery) – A smaller, leafier variety with a more intense flavor. Great for stir-fries and soups.
Cutting Celery – Grows more like an herb, producing thin, flavorful stalks perfect for seasoning dishes.
If you’re a beginner, ‘Tall Utah’ is a reliable, easy-to-grow choice.

How to Plant Celery
Celery has a long growing season—usually around 100-140 days—so timing is everything. It grows best in cool weather, so plant it in early spring for a summer harvest or in late summer for a fall harvest.
Start from Seeds or Transplants
Celery seeds are tiny and slow to germinate, so most gardeners start them indoors.
- Start seeds indoors 10-12 weeks before your last frost date.
- Soak seeds in warm water overnight to speed up germination.
- Plant seeds ¼ inch deep in seed-starting mix and keep soil moist.
- Use a heat mat to maintain temperatures around 70°F for better germination.
- Once seedlings have 3-4 true leaves, transplant them into larger pots to encourage strong root growth.
Harden off seedlings before transplanting them outdoors by gradually exposing them to outdoor conditions for a week.
Transplanting into the Garden
Celery needs nutrient-rich, consistently moist soil to thrive.
- Choose a spot with full sun to partial shade (at least 6 hours of sunlight daily).
- Mix compost and well-rotted manure into the soil before planting.
- Space plants 10-12 inches apart in rows at least 18 inches apart to allow good airflow.
- Water immediately after transplanting to help plants establish roots.

Caring for Celery
Celery is not a “plant it and forget it” crop—it needs regular attention to grow well.
1. Watering
Celery requires constant moisture to develop crisp, juicy stalks.
- Water deeply 2-3 times per week, keeping soil evenly moist.
- Use mulch (straw, leaves, or grass clippings) to retain moisture and reduce watering needs.
- Avoid letting soil dry out, as this can make celery bitter and stringy.
2. Fertilizing
Celery is a heavy feeder, meaning it needs plenty of nutrients throughout the growing season.
- Apply a balanced organic fertilizer every 2-3 weeks.
- Side-dress with compost or fish emulsion to boost growth.
- If stalks seem thin, use a high-nitrogen fertilizer to encourage leafy growth.
3. Blanching for Tender Stalks
Blanching is the process of shielding the celery stalks from sunlight to produce a milder flavor and pale-green color.
- Self-blanching varieties naturally fold their leaves over the stalks.
- For others, mound soil or mulch around the base of the plants once stalks reach about 8 inches tall.
- Another method is wrapping stalks with newspaper or cardboard 2-3 weeks before harvest.
Best Companion Plants for Celery
Companion planting helps celery thrive by repelling pests, improving soil health, and enhancing growth.
Best Companion Plants:
- Onions & Garlic – Their strong scent deters aphids and carrot rust flies.
- Lettuce & Spinach – These leafy greens help shade the soil, keeping it cool and moist for celery.
- Bush Beans & Peas – Legumes fix nitrogen in the soil, giving celery an extra nutrient boost.
- Cabbage & Cauliflower – They provide shade and create a microclimate that helps retain soil moisture.
- Dill & Cilantro – These herbs attract beneficial insects that prey on celery pests.
Bad Companion Plants:
- Carrots & Parsnips – They compete for nutrients and attract similar pests.
- Corn – Tall corn can shade celery too much, reducing its growth.
- Potatoes – They can stunt celery’s growth by depleting the soil’s nutrients.
Planting celery near the right companions will reduce pest problems and promote healthier growth.
Managing Pests and Diseases
Celery is prone to a few common pests, but with the right strategies, you can keep your plants healthy.
Common Pests:
- Aphids – Suck the sap from leaves, causing curling and yellowing. Use neem oil or insecticidal soap.
- Celery Leaf Miner – Tiny larvae burrow into leaves. Remove infected leaves and encourage beneficial insects.
- Slugs & Snails – Feed on young celery plants. Use crushed eggshells or diatomaceous earth as barriers.
Common Diseases:
- Early Blight – Yellow spots on leaves caused by too much moisture. Improve airflow and avoid overhead watering.
- Root Rot – Caused by poor drainage. Keep soil moist but not waterlogged.
Troubleshooting Common Celery Problems
Celery can be tricky, but most problems can be fixed with simple adjustments.
- Thin, Stringy Stalks? – Usually caused by lack of water or nutrients. Increase watering and fertilize regularly.
- Bitter Taste? – Happens when celery is stressed by heat or drought. Keep soil moist and mulch well.
- Bolting (Flowering Too Soon)? – Often caused by sudden temperature changes. Plant at the right time and provide consistent moisture.
Harvesting and Storing Celery
Celery takes about 100-140 days to mature, depending on the variety.
- Harvest when stalks are at least 8 inches tall and firm.
- Cut stalks at the base with a sharp knife, leaving the roots intact for potential regrowth.
- For longer storage, wrap celery in damp paper towels and keep it in the fridge for up to 2-3 weeks.
- Celery can also be frozen, dehydrated, or used for making homemade stock.
Now that you know how to grow celery, you’re ready to enjoy homegrown stalks packed with flavor and crunch. With consistent watering, rich soil, and the right companions, celery can be a fantastic addition to your garden.
How to Regrow Celery from Scraps
You can regrow store-bought celery from the base of the stalk, making it a fun and easy way to get extra growth from something you might otherwise throw away. Here’s how:
Step 1: Cut the Base
- When using store-bought celery, cut off the bottom 2-3 inches of the stalk.
- Use the remaining celery as you normally would, but save the root end for regrowing.
Step 2: Place in Water
- Put the cut celery base in a shallow dish of water, with the cut side facing up.
- Add about 1 inch of water to cover the bottom but don’t fully submerge the base.
- Place the dish in a sunny windowsill or another bright spot.
Step 3: Change Water Regularly
- Change the water every 1-2 days to prevent bacteria or mold from forming.
- After a few days, you should start to see tiny green leaves sprouting from the center.
Step 4: Transfer to Soil (Optional but Recommended)
- After 7-10 days, when the new leaves and small roots have developed, plant the celery in soil for better growth.
- Bury the base in rich, well-draining soil, leaving just the new growth above the surface.
- Keep the soil moist but not waterlogged, and place the plant in a partially sunny location.
Step 5: Care and Harvest
- Continue watering regularly, and within a few weeks, the celery will continue to grow.
- You can start harvesting the outer stalks as they reach a usable size, while the inner stalks keep growing.
Will It Grow a Full Head of Celery?
Not quite. Regrown celery usually produces smaller stalks instead of a full, thick head like the original. However, the leaves and stalks are still great for soups, salads, stir-fries, and seasoning!
This method is a great way to reduce food waste and enjoy fresh, homegrown celery without starting from seed. Plus, it’s an easy project for kids and beginner gardeners!
Also check out these blogs:


